Thursday, December 27, 2012

Christmas 2012

Well Christmas has come and gone for another year and I must say that even though there are times in the lead up when I think oh my goodness is all of this really worth it for one day, but as always we had such a fantastic and fun day that I would without hesitation say hell yes it's worth it! 


As this was the first time Mr B and I were hosting Christmas, the weeks proceeding the big day were full of things like shopping for dinner sets and things to decorate the table with, not to mention the usual Christmas Baking and then someone (namely me....) decided it would be a great idea to make Christmas Crackers and Centrepieces for the table too (which it really was because they turned out awesome!) ....all whilst we were busy each night re-painting Mr B's bar.....


These little centrepieces were so easy to make and they are so cute!!


The bar was re-painted and back together just in time for the traditional Christmas Eve game of 8 ball and for like the first time ever, Mr B and I won! Although we did lose the first annual Christmas Eve foosball game...... 


The lillies (thanks Mum and Dad!) came out just in time for the big day! Mr B and I actually got to sleep in for a change, Mum and Dad came over at about 9am and we sat down with a coffee whilst we opened our presents, very civilised! (Did I mention we got totally spoilt?!) 


The Christmas table was all set and looking divine....


Then we added some food and it went from looking divine to looking delicious!! 


Although it doesn't take long for everyone to dig in and delicious turns to oh my god how do I loosen these pants! 


The only way to stop eating was to physically leave the table so we changed rooms and sat down to open some more presents.....


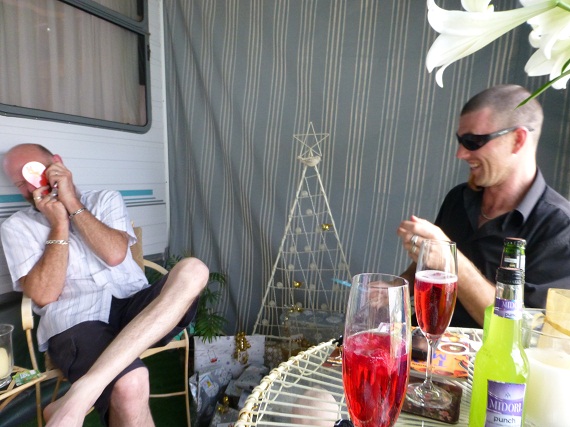
Then Mr B and I went up to Mum and Dad's for the afternoon where Mum and I had our first ever glass of champagne together...


....I'm still not entirely sure it's for me, but I'm getting used to it!


Someone (namely me again) thought it would be a good idea to give the boys paddle bats with rubber balls attached....turns out it wasn't a good idea because they just tried to hit each other with them! 


Luckily Chuck Norris (gnome style) stepped in to save the day! 


Then it was time for Mr B and I to go home and exchange presents (Spolt again!! Helllllooo new handbag!!!)


Mr B didn't do too bad either! 


And that was that. Bellies full, eyelids drooping, cheeks sore from laughter, heads full of happy memories - what a fantastic Christmas!

Mr and Mrs B xox

Sunday, December 23, 2012

Home Made Christmas Crackers


This year, Mr B and I are hosting Christmas brunch at our house for the first time. I'm  really excited, but also really nervous because we have always had Christmas brunch at my Mum and Dad's and they have certainly set big standards for us to live up to.

In saying that, I think I am nearly organised, I've got the dinner set, I've made the centrepieces, I've stamped some beautiful napkins, I've brought platters and today Mum and Dad dropped in some gorgeous Christmas Lillies. The only thing left was the Christmas Crackers! Unfortunately none of the ones in the shop really grabbed me, sure they were pretty, but nothing matched my table and the idea I had in my head for how it was all going to look. So I decided to get my Martha on and make our own Crackers or Bon Bons or whatever you want to call them!

I was surprised at how easy they were really.

All you need is

6 small cardboard tubes (you could use toilet rolls or the cardboard roll from the inside of your wrapping paper cut into 4 works great too!)
Wrapping paper
Ribbon
6 small toys (we used the little toys from the inside of kinder surprises - win/win, we got to eat chocolate and we got cool toys for the crackers! Plus I think everyone will love putting them together on Christmas Day!)
6 dodgy Christmas jokes (definitely optional!)
6 Snaps (These are the things that make your crackers go 'bang' - I brought mine on Ebay but you should be able to find them at most craft shops at this time of year)
Glue gun or glue stick

Cut the paper into 6 rectangles roughly 31cm x 25cm.

Take one square of paper and place one cardboard tube in the centre of one edge.

Place a snap underneath the tube. Place your toy and your joke in the tube.

Now roll the tube up firmly in the paper and seal with the glue.

Gently twist the ends, using the edge of your cardboard tube as a guide. Tie some ribbon around these twists to secure them.

And there you have it! Home made Christmas Crackers at a fraction of the cost and you can personalise them anyway you want!

Mrs B xx

Saturday, December 22, 2012

Mrs B tackles the Christmas Pudding!

So this year, due to space constraints in the caravan kitchen, Mum and Dad decided they just could not do the Christmas puddings. Yeah ok I get that, but Christmas with none of my Mum and Dad's Christmas Pudding smothered in cream for dessert?! I don't think so! This meant there was only one option, it was time I stepped up to the plate and tried to make it myself. Never mind I have never so much as helped my Mum and Dad make theirs before - the most involvement I've had is picking the peel out of the fruit mixture (honestly, who likes peel!?) and shaking the fruit while it soaks (long time family tradition, everyone shakes the fruit!).....this was going to be a massive learning experience. And reflecting back on it now, it certainly was!

It was at times very stressful, my little pot was definitely not big enough to boil a pudding in and resulted in it being raw the first time we took it out (after 9 hours of boiling!!) but then we went out and brought a proper big stock pot, boiled it for another 1.5 hours and it was good to go. I should clarify that the pudding should only take 3 hours to cook, but as I said, small pots + puddings = not cool. Anyway, we learnt from that and moved on, plus look at the end result, it looks like pudding, it smells like pudding and I just hope it tastes like pudding too!


Christmas Pudding - Makes 1

375g sultanas
150g glace cherries
150g dried cranberries
125ml brandy
1 cup water
1/2 cup white sugar
1/2 cup brown sugar
1/2 tspn salt
125g butter
1 tspn bicarb soda
1 lightly beaten egg
1 cup plain flour
1 cup self raising flour
1 tspn mixed spice
1/2 tspn cinnamon
Large oven bags
Brown kitchen string

In a large container, combine the sultanas, cherries and cranberries. Pour over the brandy and mix to combine. Place a lid on the container and leave in the cupboard to soak for 2 days. (At this point, we all shake the fruit container....it's good luck!)

In a large pot, combine the fruit, water, sugars, salt and butter. Bring to the boil and simmer for 8-10 mins.

Remove from heat and add bicarb soda. Mixture will begin to foam so don't panic.

Add the egg, flours and spices. Stir well to ensure everything is combined.

Now take one oven bag and cut it down the joins so it opens into a large rectangle. Place the oven bag in a large bowl so that the edges are hanging over the sides.

Spoon your pudding batter into the bowl. Bring the sides of the oven bag up and tie tightly with the string, ensuring there are no gaps for water to get in or for the pudding to expand, your bag should be water tight. Now cut open another oven bag and place the pudding into that, again bring the edges up and tie it tightly ensuring it's water tight.

In a large stock pot, place enough water to submerge your pudding (it will need to be able to float and be completely covered with water). Bring the water to the boil and place the pudding gently into the pot.

Cook with the lid on for 3 hours, turning the pudding after 2 hours. Make sure the water remains boiling constantly and replenish with more boiling water when necessary.

Once the pudding is cooked, remove from the water and allow to cool and set over night. The following day, remove from the bags and wrap tightly in cling wrap and foil. Place in the fridge until your ready to serve.

Before serving we microwave ours for 15-20 seconds (for a small slice) and serve with cream.


Did I mention how much I LOVE Christmas Pudding!? 

Last week we went to Mum and Dad's for dinner and put their Christmas tree up. Given that they are still living in the caravan there is not much for their normal tree, so this year they went with the simple (but effective!) version and I must say it was much easier and quicker to put up! 


Mrs B xx 


Thursday, December 20, 2012

A recipe from Mr B's Mum!

Sometimes I think that the whole world loses their mind at this time of year.

Traffic increases ten-fold, everyone is super stressed and super rushed (including myself) and sometimes I think we need to remind ourselves what the season is about.

It’s not about how much money you spend on someone or how many presents you have under the tree, it’s about spending quality time with your family and your friends and celebrating and relaxing and putting a smile on someone’s face.


Last weekend we caught up with Mr B’s Mum, Step-Mum, brother, sister, nieces and nephew for dinner as we don’t normally get to see them on Christmas Day. It was a lovely evening filled with chips, cheesecake, Christmas crackers and crafts, but most importantly it was just nice to have everyone together.


So I thought today would be the perfect time to share one of Mr B’s Mum’s recipes with you.

Not long after Mr B and I met, Mr B told me about this recipe and asked if I could make it for him. The original recipe stated that you could make it with crab meat, chicken or tuna.....and of course Mr B wanted crab meat. Now I should mention that when Mr B and I first met I was still very vegetarian and very anti-seafood (except tinned tuna....), but I was in a new relationship and I thought I would try this whole ‘compromise’ thing....needless to say I could barely swallow the crab meat and have never made it again ever since. But a few weeks ago Mr B asked if I could make it again, this time with tuna and I do love me some tuna! It was really easy and so tasty! I hate to admit it but it may even have earnt itself re-entry into regular rotation!


 Mr B’s Mum’s Versatile Curry

You will need:

1 pkt of chicken noodle soup
1 onion – chopped
1 carrot – diced
2.5 cups cold water
310g tin of sweet corn, drained
1 tspn curry powder
400g tin of tuna chunks in springwater (feel free to substitute with 500g chicken breast or 500g crabmeat)
2 cups of milk
2 tbspns of cornflour
Rice to serve

In a large, lightly greased, frypan over medium heat, fry the onion and carrot for 3-5 mins or until onion is softened.

Add the soup mix and water and bring to the boil. Allow the mixture to simmer for 5 mins.

Add the corn, curry powder and milk. Simmer for a further 5 mins.

Add the cornflour and tuna. Simmer with the lid on for 7-10 mins or until mixture is thickened.

Serve over steamed rice.

Enjoy!


Mrs B xx

Sunday, December 16, 2012

Weekend Round-Up!

Mr B and I have had such a HUGE weekend.....and we are totally exhausted so this is going to be a short post because we want to get some sleep!! 

On Friday night we got home from work and got all dolled up to go to my work Christmas party. Initially we weren't going, but for the last week or so absolutely everyone has been on my case about it including my boss and I mean really, when your boss tells you you're going....you're going! 

Anyway, we were both really glad we went because not only did we dance ourselves silly and have a great time catching up with everyone but I won some awards! I was extremely proud and honoured to the recipient of the CEO's Award for Excellence which is given to the staff member who best represents our motto of being 'Committed to Care.' I had no idea I would be receiving the award or that that was the reason everyone was so concerned about whether Mr B and I were attending or not, so I was completely taken by surprise and my hands were shaking so much Mr B had to hold the award for me! 

That was incredible enough, but whilst I was receiving the award, my boss also presented me with a certificate that arrived in the mail at work that very day....the certificate was made out to me and was for our Girls Night In for Breast Cancer back in October - it was to thank us for being the '9th Highest Fundraiser in Tasmania for 2012! I was completely stoked by that and again very proud and very honoured. 


Mr B and I had a bit of a sleep in on Saturday and then got stuck back into cleaning and painting out the bar.....whilst we were working hard, the lambs decided to relax and chill out on the pergola....


And today we were back into the painting again! I called it quits just after lunch because I had Christmas pudding to make!! My pot was a little small though so Mr B rigged me up with a Pudding Suspension System! While the pudding cooked I made a rainbow cake for Mr B to take to work tomorrow and I also made our Christmas Crackers!! I'll show you the finished pudding and crackers, and how you can do it all yourself, later in the week! 


I hope you had a great and productive weekend too!

Mrs B xx 

Thursday, December 13, 2012

Pina Colada Cupcakes

I feel like I should start this post by telling you that at this particular moment in time, I am not being a good wife.

I am sitting on the couch in our garage writing this post, while Mr B paints the ceiling.

Not long after we moved into this house, Mr B converted the garage into a bar and he has done a fantastic job. The walls and ceiling in the garage / bar are like a grey colour and they really needed some livening up so Mr B went out and brought himself some bright blue paint and some bright green paint with visions of green walls with a blue roof and blue trims.

To be honest I thought he was mad and I believe someone may have said it was going to look like Cookie Monster and Kermit threw up.....but despite all this, Mr B stuck with what he wanted and I have to admit, it is looking amazing! I will put some photos up as soon as he is done (which should be just in time for our annual Christmas 8-ball tournament!!)


So how did I get away with sitting on the couch with my feet up whilst Mr B finishes the painting? I made him these Pina Colada Cupcakes of course! And I couldn't help but make them in these two little Christmas pans I got last year, how cute are they!!


You will need:

115g butter, melted
1 cup of caster sugar
3 eggs
1.5 cups of self raising flour
3/4 cup milk
1 tspn rum essence
1 tspn coconut essence
125g tin of crushed pineapple (and juice)

In the bowl of an electric mixer, combine the butter and sugar. Beat until pale and creamy.

Add the eggs and beat until well combined.

Add the flour, essences and milk and beat until mixture is smooth.

Stir through the pineapple and juice, ensuring everything is mixed through.

Grease 2 x 12 hole cupcake tins and line with paper liners. Fill each one 3/4 full and bake for 20 mins. These are a very moist cake so they may not look done, but if you gently press on the top and it bounces back, they are good to go!

This recipe should make around 18 cupcakes.

And here are some Rice Krispie Christmas Trees and Christmas Wreaths I made for Mr B's lunch boxes using this recipe and adding just a couple of drops of green food dye!


Enjoy!

Mrs B xx

Monday, December 10, 2012

Surprise Centre Chocolate Truffles

Over the weekend I did a whole heap of baking and am really pleased with the way it all come out - sending Mr B to work today with a lunch box full of Christmas goodies just made me happy and really makes me feel like Christmas is here.

Mr B's Mum's chocolate truffles were on my Must-Bake list this year, with just a few small tweaks......


Surprise Centre Chocolate Truffles

You will need:
375g tin of Condensed Milk
2 cups of crushed biscuits (I used 2 pkts of Malt Biscuits and put them through the food processor to get a fine crumb)
1 cup of dessicated coconut (plus extra for rolling)
2 tbspns of cocoa
1 bag of marshmallows

Combine the condensed milk, crushed biscuits, coconut and cocoa in a large bowl. Mix until well combined - you may need to get your hands in there!

Place the mixture in the fridge for 5-10 mins to firm up a little.

Remove from the fridge and set yourself up with a baking tray, the marshmallows, a bowl with the extra coconut in it, and a bowl of warm water - I find that having the bowl of water handy is great because the more mixture you get on your hands, the more the truffles stick to you.

Take a tablespoon of the truffle mixture and flatten it out in the palm of your hand. Place a marshmallow in the centre of the mixture and then work the mixture into a ball so that the marshmallow is sealed inside. Roll in the extra coconut and place on the baking tray.

Repeat with remaining mixture and marshmallows. Place in the fridge for an hour to firm up and then enjoy!!!

I know Mr B really enjoyed these. He loves the traditional chocolate truffle balls but sometimes they can get a bit chocolat-ey and biscuit-ey for him so the addition of the surprise centre was a great idea and you don't have to use marshmallows, you could use jubes or brownies or cookie dough - just about anything you want!!

And have a look at what else we made recently.....Ninja-Bread Men!!! These came out about recently when I told Mr B I was on my way inside to make some Gingerbread Men for his lunch, to which Mr B replied 'I don't want Gingerbread Men.....I want Ninja-Bread Men!!!


Mrs B xx

Friday, December 7, 2012

Burrito Bowls

It's been a beautiful warm day here, the sun has been shining, the breeze has been cool and to top it off, Mr B and I have had the day off work. 

Mr B and I were up early today to meet some of our friends for breakfast. Not only was it one of their birthday's, but it was also the last time we will see them for a month as they are heading off on a big road trip this week to spend a month in Sydney with family. We had a really lovely morning and it was so good to catch up with them, but we sure are going to miss them while they are away! After breakfast Mr B and I came home and were surprised that we had been up, out for breakfast and home all before we would normally even wake up on our day off! 


Mr B spent the rest of the day mowing our property and I did some baking, went to the optometrist (how hard is it to pick a new pair of frames for glasses - there is just too much choice!!), did some shopping and came home. Something about the warm weather or maybe it's everything we have got done today, but either way I'm exhausted and want something easy for tea. I think these Burrito Bowls are perfect 'Friday Night' meals and perfect Summer Night meals too! 


Burrito Bowls - Serves 2

2 Tortillas
200g beef mince
400g can of red kidney beans
1 pkt burrito seasoning
2 tomatoes diced
1/3 cup corn kernels (2 small tins or 1/2 400g tin)
1 avocado, peeled and sliced
2-3 lettuce leaves. shredded
Salsa, Sour Cream and Grated Cheese to serve

Pre-heat oven to 110C.

Place 2 empty and clean glass jars on a baking tray with the lids off. Lay a tortilla over the top of each jar allowing the edges to hang down. Bake for 15 mins or until crisp.

Place mince in a lightly greased fry pan over medium heat and cook until browned. Add the beans, burrito seasoning and 2-3 tbspns of salsa. Cook for 5-7 mins.

To assemble the bowls, place a tortilla bowl on a plate. Add the mince mixture, tomato, corn, lettuce and avocado in alternating sections. Top with salsa, sour cream and grated cheese.


These were absolutely delicious. And I mean you could just do the beans with no mince for a vegetarian version, you could add chicken instead of mince, you could do whatever you want, but whatever you do I definitely recommend you try this!

Mrs B xx

Tuesday, December 4, 2012

Lemon and Lime Crepe Cake

By now I think we all know that I like any excuse to make a cake. So last week when Mum and Dad came for dinner, despite it being 2 days before Mr B's birthday, I decided to make a birthday cake.

I had been given a jar of home made lemon curd a few days before and it gave me the inspiration for this amazing Lemon Curd and Lime Cheesecake Crepe Cake!

This is what it looked like cut in half.


And the birthday boy, who is still talking about the cake and would have eaten the whole thing on his own if we had let him!


Lemon Curd and Lime Cheesecake Crepe Cake

8 crepes
1 cup of lemon curd
200g cream cheese, softened
1/4 cup icing sugar
1-2 tbspns lime juice

Start by making your cheesecake mixture. In the bowl of an electric mixer, combine the cream cheese, icing sugar and lime juice to taste. Beat until smooth and creamy. Set aside.

To assemble your cake, start by placing one crepe on a large plate / platter / cake stand. Spread with 1/4 of the cheesecake mixture. Top with another crepe and spread with 1/4 of the lemon curd. Repeat layers until all of the crepes, cheesecake and lemon curd have been used.

Place in the fridge for an hour to chill.

And that's it! How easy is that! That is what I love about this cake, it's so quick and easy to throw together, but at the same time it's quite impressive to look at when you cut it open and see all the layers. Plus it tastes divine and really there are so many different things you could do with the filling like my Nutella and Strawberry Cheesecake Crepe Cake!

Enjoy!

Mrs B xx

Sunday, December 2, 2012

Mr B's Birthday

Last Thursday was Mr B's birthday so let me just start off by saying HAPPY BIRTHDAY MR B!!! 

As usual, Mr B was totally adamant that he just wanted a quiet birthday, no fuss, no surprises, just a nice normal relaxing day. 

And as usual, I ignored him. 

The festivities began the week before Mr B 's birthday. You see Mr B unfortunately had to work on his actual birthday and despite my consistent begging, he refused to have the day off. That just meant I had to get sneaky about the celebrations, which I do every year so really I had no issue with it. I roped Dad into my evil plan and he was more than happy to help. Dad arranged for a bike run and told Mr B that a group of them were going to go for a ride and stop for lunch somewhere. Meanwhile I spoke to all of Mr B's friends and got them on board with my plan too.

The day of the ride arrived and it was a beautiful sunny day. A group of us set off, sun shining on our backs, wind in our faces, it was lovely....and then all of a sudden Dad indicated and turned off the highway, Mr B was confused (and slightly agitated because he thought Dad was taking us all to a garden shop....) and then he saw the big sign that said Tas Laser Skirmish and it dawned on him....he had a few choice words to say to me, but I could hear the smile in his voice and knew he was grinning somewhere under that helmet. We pulled up in the car park and it just got better because all of Mr B's friends were there waiting for him and Mr B was slightly put out that they were all in on it and no one told him a thing!

The boys split into two teams (Team Mr B vs. Team Dad) and got all kitted out in their army fatigues. Next step was choosing your laser gun and everyone chose the little gun....except Mr B and Dad who chose the biggest possible one they could get....


This was Team Dad....now I know they look like they would be the most organised team....but they went into each and every game with no plan of attack what so ever.....


This was the motley crew known as Team Mr B.....proving that looks can be deceiving, they actually had a strategy!


This was the boys learning how to use their laser guns.....


And this was the group shot right before they 'went to war'


'Everyone shoot the birthday boy!!!'


It was such a great day. The girls decided to sit the whole war thing out, so we parked ourselves in a shady spot overlooking the 'war zone' and watched it all unfold. The game went for around 2.5 hours and in that time they played around 5-6 different games, each one with a different area to cover, fort to defend etc. Once that first whistle blew, the adrenalin kicked in and the boys became soldiers It was hilarious from where we were because there would be total silence and we couldn't see anyone at all, then all of a sudden there would be gun-fire and boys ducking, diving, running and rolling in all directions! Highlights from the day would have to be Mr B getting 'accidentally' shot by one of his own team mates and Dad playing dead in the last game of the day in order to seek revenge and take out the title of 'Last Man Standing.' At the end of the day Team Mr B were victorious, but the important thing was that everyone had a great time, although over the next day or two we did learn that you should always stretch before going to war!! 

Now a few days later, we had the actual day of Mr B's birthday. I had things planned for the evening, but not so much for during the day because Mr B was at work. That bothered me. Firstly you just shouldn't work on your birthday and secondly if you absolutely have to work, then it should be memorable. So I got on the phone and organised a surprise....and then I waited. Later that afternoon I got a txt msg from Mr B that again involved some choice words (he really doesn't do surprises) and then another one that was a photo of the Happy Birthday balloon and single red rose I had delivered to his job site. I am evil so I can totally understand the choice words, but as the afternoon wore on, Mr B was actually quite pleased and impressed because all the other boys were jealous that they never got things like that delivered to them! 


After work Mr B had a visit from his Mum so I disappeared up the road to get some supplies for dinner. It was a beautiful warm evening and a perfect time to christen our new pergola with a cold whiskey and bbq chicken and chip sandwiches! It was just so lovely and relaxing out there!


Then it was inside for the most important part....presents and cake!!! Given the roller coaster ride we have had with our little lambs this year, a lamb / sheep cake was absolutely the only option. The only problem was it was far too cute to cut!! 


HAPPY BIRTHDAY MR B!!!!


Mrs B xx

LinkWithin

Related Posts Plugin for WordPress, Blogger...